Try it!
Video: Sync SharePoint and Teams Files to your Computer
Sync the files in your Microsoft 365 or Microsoft SharePoint site libraries so they’re always available on your computer, even when you’re offline.
Turn on Files On-Demand in OneDrive
-
In the Windows notification area, select the blue OneDrive cloud icon.

Note: If you’re on Windows 10, your computer already has the OneDrive desktop app on it, but you'll need to turn on Files On-Demand in OneDrive settings.
-
Select
 Help & Settings > Settings.
 -
Select Settings > Save space and download files as you use them.
Set up Sync for your library
-
In your browser, on your SharePoint site, navigate to the library of files you want to sync with.
-
Select Sync in the toolbar.

Note: If your browser asks for permission to use OneDrive, confirm that it's OK.
-
Sign in to OneDrive to start syncing your files and finish OneDrive setup.
Work with your files in your file system
-
Once synced, your SharePoint files appear in File Explorer under the name of your organization (or in Mac Finder, if you're using a Mac).
-
Each location will appear in a separate subfolder.
-
Copy or move files from your computer to SharePoint right from your file system.
-
To check the status of your files, add an account, or manage other sync settings, select the blue OneDrive cloud icon in the Windows notification area.
Work with files in Files On-Demand
After Files On-Demand is turned on, you’ll see new status icons next to each of your SharePoint files. You can copy or move files from your computer to SharePoint right from your file system.
 |
Save space on your device by making files online-only. These files are only available when you're connected to the Internet, but don't take up space on your computer. |
 |
When you open an online-only file, it downloads to your device and becomes locally available. You can open a locally available file at anytime even without Internet access. |
 |
To make a file always available, even when you're offline:
To change a file back to an online-only file:
|
Change sync settings
To change the folders that sync for a site, or to stop syncing all files on a site, follow these steps:
-
Select the blue OneDrive cloud icon in the Windows taskbar notification area.
(You may need to select the Show hidden icons arrow
 next to the notification area for the OneDrive icon to appear. If the icon doesn't appear in the notification area, OneDrive might not be running. Select Start, enter OneDrive in the search box, and then select OneDrive in the search results.)
-
Select
Help & Settings > Settings.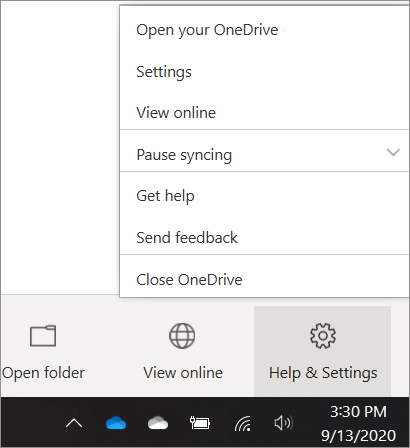
-
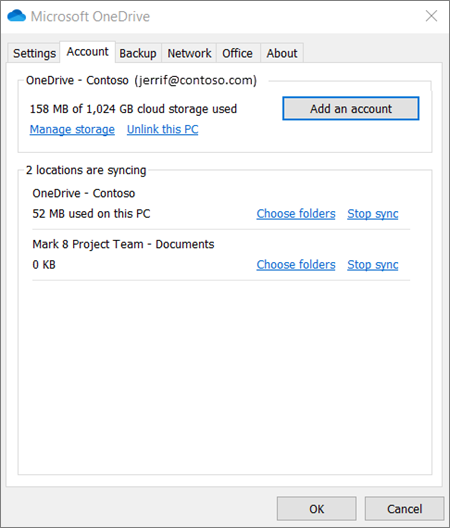
To see a list of all your syncing sites, select the Account tab.
-
To change the folders that you're syncing, select Choose folders for that library, and then select the folders that you want to sync. To stop syncing a site, select Stop sync next to the site. (Copies of the files remain on your computer. You can delete them if you want.)
Comments
0 comments
Please sign in to leave a comment.